

A Brief Deployment History
For many years, the only long gun in police work was the 12-gauge shotgun. Two incidents would change police tactics and weapons nationwide.
During the 1997 North Hollywood bank robbery, a stunned nation watched a live TV broadcast as a shootout raged for forty-four minutes. Two heavily armed robbers wore body armor and used high-powered automatic rifles, outgunning responding police officers armed with handguns and shotguns.
Two years later, the Columbine school shootings took the lives of thirteen victims. At the time, police were trained to set up a perimeter and wait for SWAT units to arrive. SWAT entered the building forty-three minutes after the shooting started.
A change in tactics and firepower was needed. The police would no longer be out-gunned or wait outside during active shootings. The answer was the .223 caliber patrol rifle and a combat mindset.
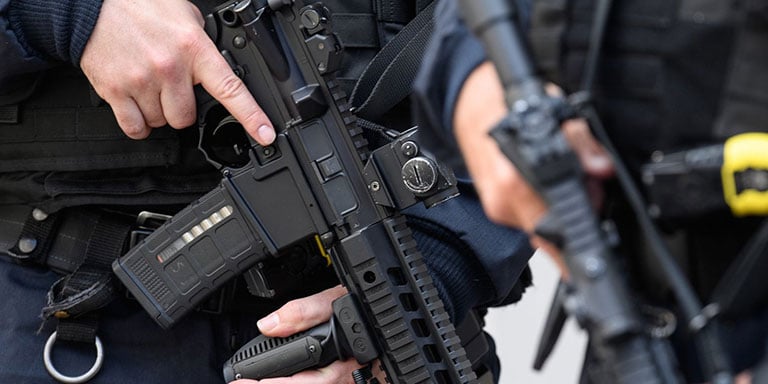
The Semi-Automatic .223 Rifle
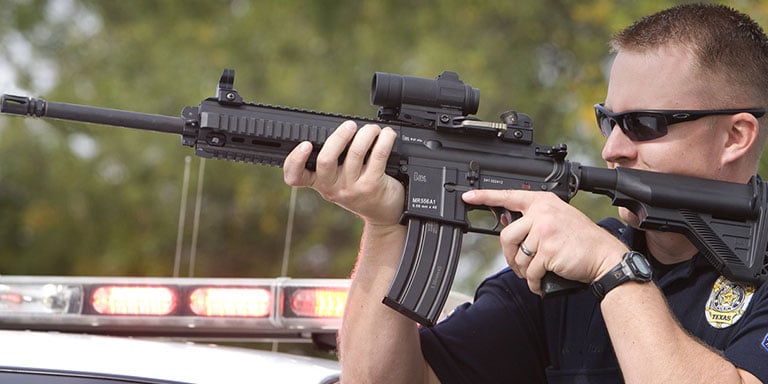
Many SWAT teams were already using the AR-15 type rifle in either the Remington 223 or 5.56 NATO calibers. The AR-15 is the civilian clone of the military M-16 used for decades in Vietnam. The weapon is extremely accurate, and with a thirty round magazine, it is formidable.
From Combat to Law Enforcement: Bullet Technology
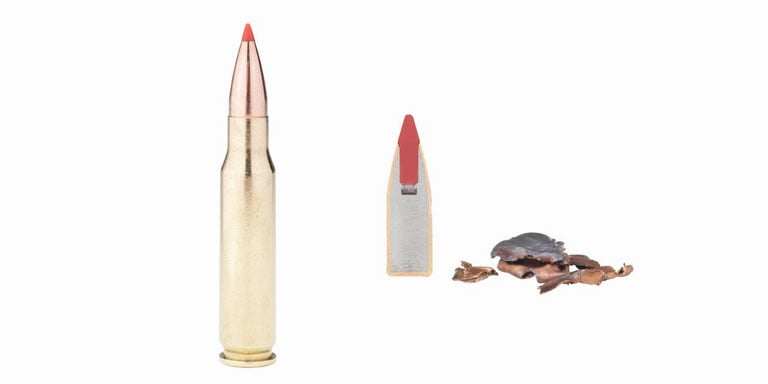
Using a combat weapon in an urban environment would never have been possible without new bullet technology. The .223 round is a very small-diameter bullet with a high velocity. It has the ability to go right through the intended target and potentially hit unintended targets. A round was needed that could stop quickly without over-penetration. This problem was solved with a rifle round that rapidly expanded and fragmented.
The bullet is similar to a hollow point, but part of the hollow space is filled with a polymer tip that acts as a plunger, forcing the bullet to rapidly expand and fragment on target contact.
Tactical Shooting Positions
The butt-stock (or plate) is held securely against the area just inside the shoulder joint. AR-15 type rifles have a pistol grip, allowing both hands to pull the weapon into the shooter. The shooter's finger stays outside the trigger guard as the shooter raises the weapon. The sights should rise to meet the shooter's eye level.
There are four basic shooting positions: standing, kneeling, sitting and prone.
The Standing Position
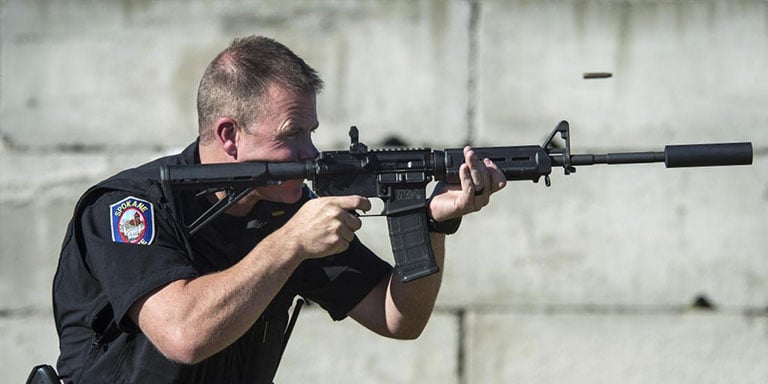
The standing position must be mastered as shooting on the run, or shooting and moving. This is common in many law enforcement response scenarios. While the standing position allows the most mobility, it is also the least stable shooting platform.
The shooter will have their feet about shoulder width apart with their strong-side leg slightly back at a forty-five-degree angle. Their knees should be slightly bent with their elbows in. The shooter will lean slightly forward, absorbing any recoil from firing the weapon while staying balanced.
The Kneeling Position
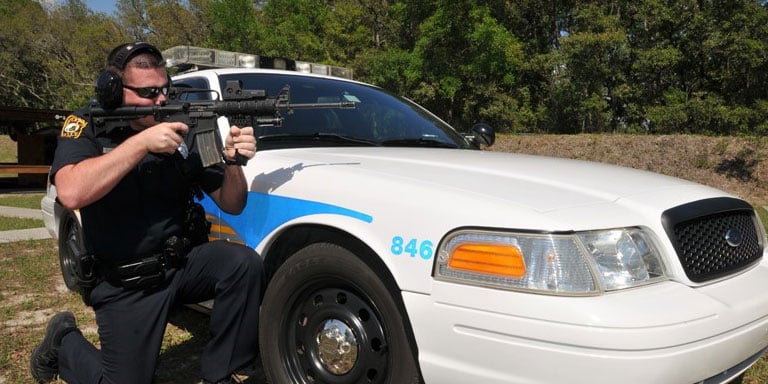
The kneeling position is a little more stable than the standing position and is the second most mobile position. The significant advantage of kneeling is that the shooter becomes a much smaller target. Many fixed objects can provide cover from the kneeling position, including a fire hydrant, a telephone pole or the officer's patrol car.
The kneeling position allows the officer to take cover and adapt their level of exposure to the item providing cover. Always kneel with the strong-side knee down. In a high kneeling position, the officer will stay upright. This should only be used to clear a higher fixed cover object. It provides a much less stable shooting platform than the low kneeling position.
In the low kneeling position, the shooter lowers their upper body and sits back on their foot with their support-side knee at a comfortable outward angle. This will help to provide a stable base. The shooter's support-side elbow is placed on their knee. This knee-to-elbow contact will significantly stabilize the weapon. The elbow should be placed just above (but not directly on) the kneecap. In either kneeling position, the placement of the back foot is critical.
The shooter's feet should never be turned down flat with their laces against the ground. Sitting on your foot in the position for several minutes will cause a loss in blood circulation to your foot, making it numb and greatly hampering your mobility. The toe should be tucked under the foot in a flexed position. By keeping the toe flexed, the officer is ready for rapid movement.
The Sitting Position
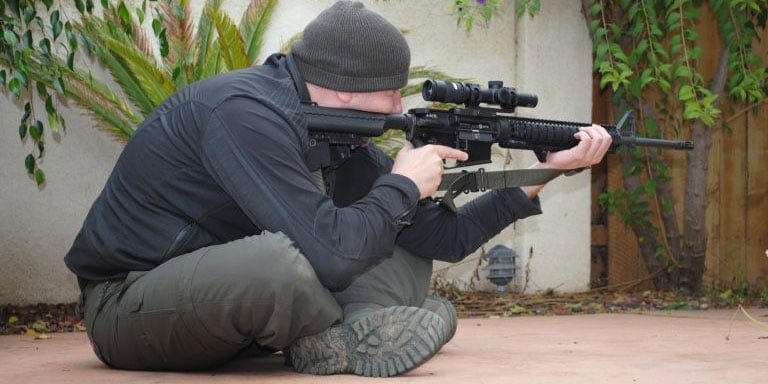
The sitting position allows the officer to maintain a position of cover and have a stable shooting platform. The seated position is preferable over the kneeling position when the shooter may be stationary for an extended period of time, such as when establishing a perimeter during a hostage negotiation.
There are several variations in the sitting position. In each, the shooter will begin by sitting on their rear-end with their legs in front of them. The first variation is to sit crossed legged or crossed-ankle with both elbows resting comfortably against their knees just above or below the kneecaps. Another variation is to place both legs out in front, with knees partially bent, and legs comfortably open. In this position, the elbows are also placed against the knees. It is essential in any sitting position to lean forward into the knees providing a stronger shooting platform.
The Prone Position
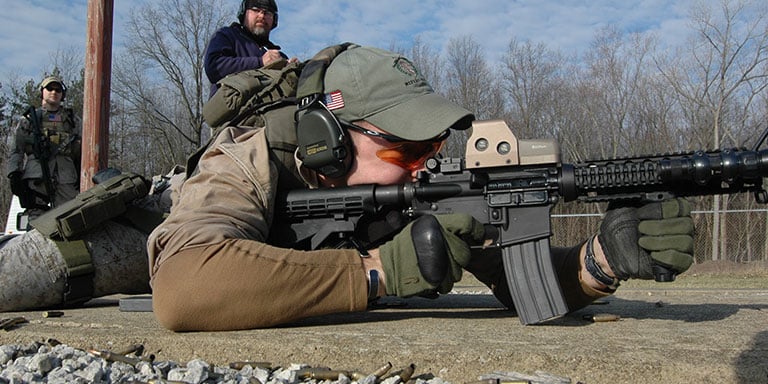
The prone position is the most stable shooting platform while presenting the smallest target to return fire. To achieve this position, start by kneeling on both knees, then reach forward onto the ground with your support-hand and lower yourself to your stomach. While holding the weapon, both elbows should be on the ground.
The strong-hand will be on the pistol grip pulling the butt of the weapon tight to the shoulder. The support hand will be underneath and holding the front hand-guard, completing the rifle shooting platform.
There are two accepted positions for the shooter's legs. The straight leg position is just as it sounds: both legs straight back and comfortably spread. The second position is the cocked leg position. The shooter bends the strong-side knee, moving the leg out to the side and forward, as if starting to crawl. This creates some space between the shooter's stomach and the ground, removing pressure from the shooter's stomach and chest. This position is particularly helpful to larger and heavier shooters.
There are two drawbacks to the prone position. First, it limits mobility, taking time to get up and out of this position. The second drawback involves the potential for being hit by a ricochet. In an urban environment, most surfaces are concrete or asphalt. Bullets that ricochet off a hard surface on the ground tend to continue on a trajectory close to the ground.
Mastering Iron sights
Before adding a scope or sight enhancement to a patrol rifle, iron sights should be mastered. Many things can happen to cause add-on sighting systems to either fail or become inaccurate. However, the iron sights will always be there and, if mastered, can be extremely accurate.
Sight Alignment
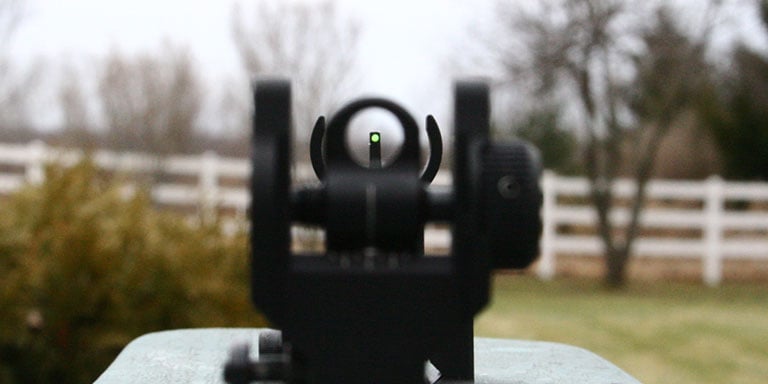
The rear sight is a round aperture that the shooter looks through with their dominant eye. A proper weld between the shooter's cheek and the rifle stock is essential. The shooter's head will remain straight while keeping a natural alignment between the shooter's dominant eye and the rear sight.
The front sight is a center post with two side wings. The post must be centered in the middle of the rear sight ring both vertically and horizontally. When the two sights are aligned, the bullet will hit where the shooter is aiming, just above the front sight post. If you think of the front post as the letter "i," the bottom of the letter is the front post, and the dot is where the bullet will go. This is often called "dotting the i."
There are three natural points of focus when taking aim with iron sights. You can only focus on one of the three, and only one is correct. They are the rear sight, the front sight, and the target. The shooter must train to focus their dominant eye only on the front post sight. The rear sight and the target should both be slightly out of focus or fuzzy. Proper focus takes practice to master, but in time, this learned skill will become automatic.
Trigger Squeeze
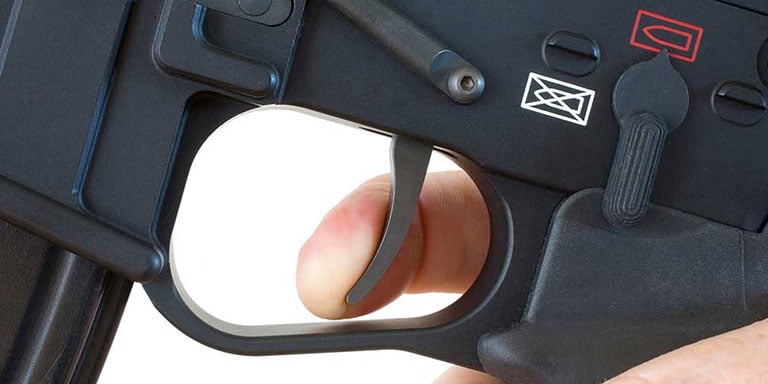
There is nothing more frustrating than having a perfect sight picture and alignment but still completely missing the target. Most of the time, it is either the shooter's trigger squeeze or their breath control.
The trigger squeeze starts with the proper grip of the weapon. AR-15-style rifles have a pistol grip which is helpful. The handgrip is grasped high but comfortably on the handle. It's a natural handshake-type grip, allowing the trigger finger to extend along the side of the weapon.
Several methods exist to find the right finger position. Many shooters will start with a natural and comfortable finger placement and find immediate success, while others will need direction. For those struggling with too much or too little finger on the trigger, try this consensus view of the best finger placement. The area midway between the tip and the first joint of the shooter's trigger finger will be the contact point with the trigger. Be aware of your finger placement and practice this until it becomes natural.
The squeeze of the trigger must be smooth and deliberate. The trigger cannot be jerked, pulled, or yanked. It must be a smooth, easy pressure moving the trigger directly back until the weapon discharges. During and immediately after the trigger squeeze, the sight alignment and sight picture must not change. The only part of the weapon that moves at all is the trigger. The trigger squeeze must be practiced until it is mastered. Dry firing is an excellent training tool to overcome the flinch of anticipated rifle recoil. Unlike a shotgun, the recoil of an AR-15 type rifle is very mild.
Breath Control
A shooter controlling their respiration is a learned skill. The shooter should be relaxed and breathing calmly. This will be difficult in stressful situations. Breathing is automatic, but it's more than just inhaling and exhaling. A third component must be identified and used. It's called the natural respiratory pause. After a person inhales and exhales, there is a pause of two to four seconds where the chest is not moving.
This pause can be extended for up to a maximum of ten seconds. Ideally, a shooter will take their shot during an extended respiratory pause, when the body is still. A word of caution — if you exceed ten seconds, take another breath, exhale and shoot within the pause.
Putting it All Together

Learn and practice getting into and recovering from the four tactical shooting positions. Practice proper positioning and develop a stable shooting platform from each. Learn the proper placement of the shooter's cheek to the stock.
Learn the parts of the weapon's iron sights, how to align them and how to create a stable sight picture. Place the sight picture onto the center of the target, creating a stable target picture. Remember to use the dominant eye and focus that eye on the front post sight.
Properly grip the pistol grip and use the correct portion of the index finger on the trigger. The trigger squeeze must be a smooth, continuous action, keeping the sights aligned through the shot. Be aware of your breath control and work to utilize the natural respiratory pause during the trigger squeeze.
Mastering the AR-15 style patrol rifle takes time, qualified instruction, and repetitive practice. Once achieved, this level of skill must continue to be maintained by training on a monthly (or at least quarterly) basis. The patrol rifle has allowed police officers to respond to virtually any emergency without fear of being out-gunned. The weapon's effectiveness will be determined by the skill of the officer who deploys it.
Did you find this article helpful?
Related Articles
-
Law Enforcement Guide to De-escalation Techniques
The art and science of de-escalation will take time, training and practice to master. Read up on applicable skills here.
Service, Skills
99 others found this helpful -
How to Set Up a Police Duty Belt
In a job where every second makes a difference, you need to be sure your police duty belt is set up for maximum efficiency.
Skills
73 others found this helpful -
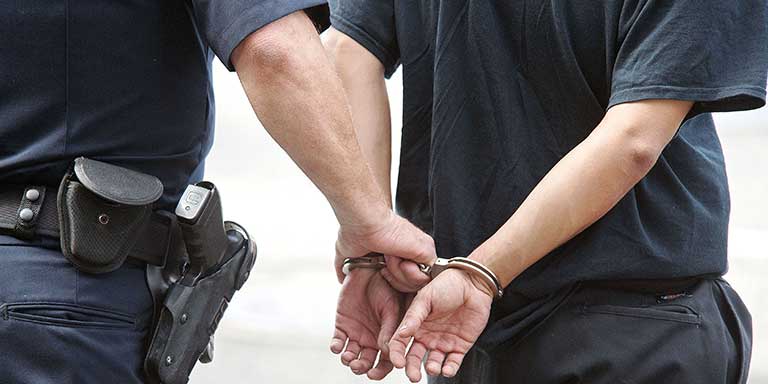
How to Use Police Handcuffs
Learning when and how to properly handcuff individuals is essential for every police officer.
Service, Skills
69 others found this helpful -
Police Officer’s Guide to Staying Safe During COVID-19
To stay protected during this time of crisis, take a look at our police officer’s guide to staying safe during COVID-19.
Service, Skills
61 others found this helpful -
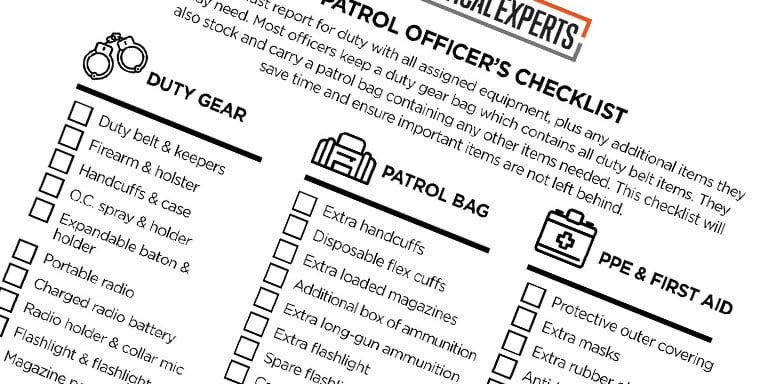
Patrol Officer’s Checklist
Use this checklist to ensure you report for work with all assigned equipment.
Skills
45 others found this helpful -
How to Make a Death Notification
A proper death notification is a duty and an honor. We walk you through how to prepare for this difficult assignment.
Skills
42 others found this helpful