

Pistols and shotguns are pretty straightforward, but trying to hit a target at long range with a rifle can make you feel like you have no idea what you're doing. Rifle scopes in particular can have many markings and moving parts that seem overwhelming if you don't yet know how they work.
In this guide, we'll introduce the fixed parts, moving parts and lenses of rifle scopes to help you gain a basic understanding of what to adjust and how. We'll also review the numbers and markings you're most likely to see on a rifle scope, and we'll offer some tips for buying and adjusting your first one.
Fixed Parts
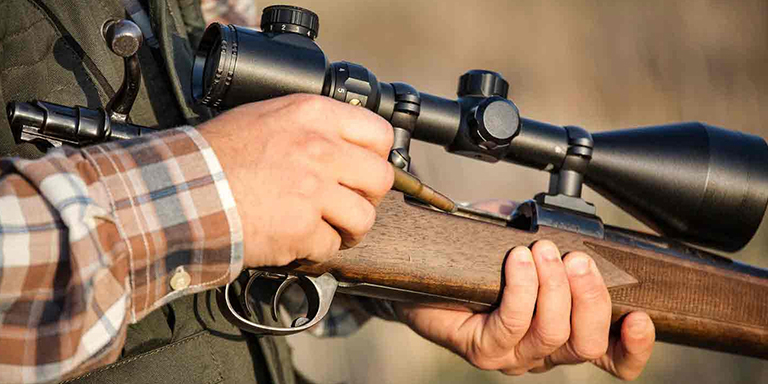
The fixed parts of a rifle scope — those that don't move — are pretty simple.
The scope tube is the body of the scope — the narrow part between the lenses. Tubes come in three diameters: 1 inch, 30mm, and 34mm. This is the size of the scope ring or mount you'll need to attach the scope to your rifle, so be sure to get matching hardware. A larger-diameter scope is also heavier, so try to avoid putting a big scope on a small, lightweight rifle.
The objective bell is, fittingly, the bell-shaped part of the scope body between the scope tube and the objective lens (the bigger lens that faces downrange, toward your objective). Its main function is to hold the objective lens in place.
Adjustable Parts
Depending on complexity, price point and intended purpose, the scope you choose will have any number of adjustable parts. Not all scopes have all of these parts, but you're bound to find at least some of them on the scope you choose.
Power Ring
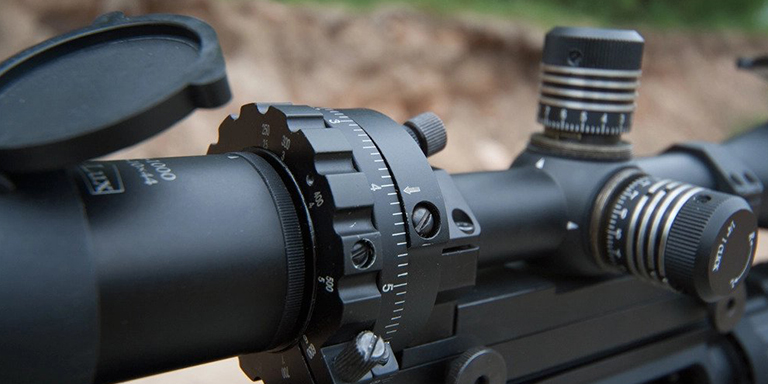
On scopes with adjustable magnification, the power ring is how you zoom in and out. Some scopes allow you to smoothly "scroll" between minimum and maximum levels of magnification, whereas others only let you "click" between preset zoom levels, such as 4x and 8x. The scope's magnification levels will be indicated by a range (e.g. 4x-12x).
As a rule of thumb, zoom levels from about 1x-5x are used for close-range hunting, 3x-9x for medium and long-range hunting, and 10x or bigger is for long-range precision shooting (hunters don't usually shoot at game that far away).
Windage and Elevation Turrets

The windage and elevation turrets adjust the scope's point of aim horizontally and vertically, respectively. Most scopes manufactured and sold in the U.S. use units called minute of angle, and adjust in increments of 1/4 or 1/8 MOA. Some scopes use milliradians — different units, but the concept is the same.
Parallax Adjustment Turret
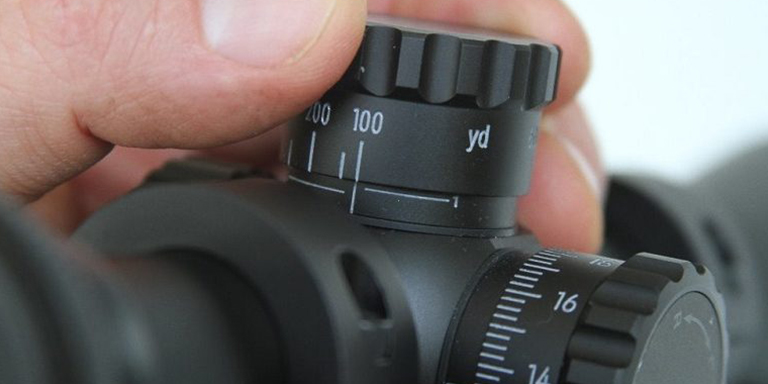
Depending on the type of scope, a parallax adjustment turret may or may not be present. Parallax is a sight alignment error that can happen when you look through the scope at an angle as opposed to looking through the scope dead-on. Electronic sights experience this problem more often and more severely, but it can still happen with traditional scopes.
If you must look through the scope at a weird angle, the parallax adjustment turret can help adjust your perceived point of aim to match the bullet's actual point of impact. Fixed (non-zoomable) rifle scopes are parallax-free at 100 yards, so if you're shooting farther than that, you'll have to learn to compensate manually for the distortion.
Diopter
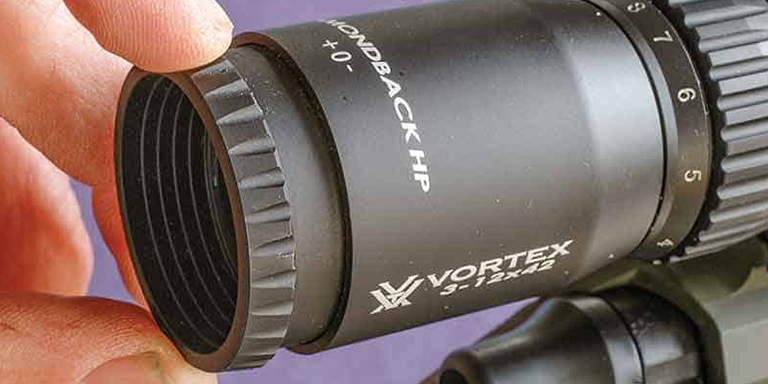
The diopter is a rotating ring that brings the reticle into sharper focus when it's blurry. The clarity of the reticle is dependent on your vision, so different shooters sharing the same scope will likely need to adjust the diopter each time the rifle changes hands.
Lenses
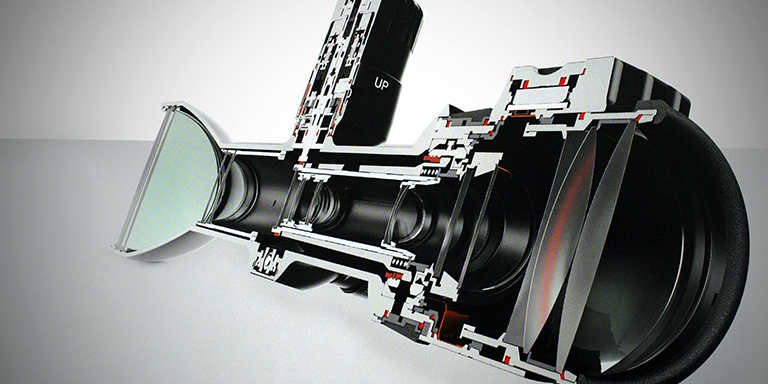
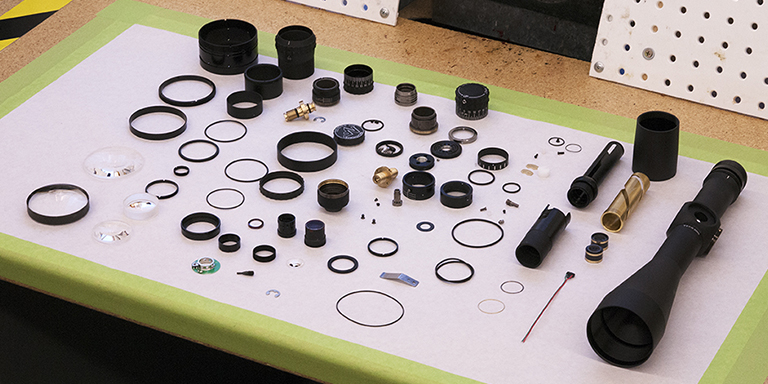
Although you can only see two lenses on a rifle scope, most actually have six. Virtually all rifle scope lenses are coated with a special film to protect the lens from scratches and to improve the transmissibility of light through the lens, thus enhancing image clarity.
Objective Lens and Focus Lens
The first of a scope's six lenses, light enters the scope through the objective lens. Next, light passes through the focus lens, which is directly under the elevation turret. This lens is moved back and forth by the parallax adjustment turret if there is one; if not, the lens is fixed in place. If we were to view the image at this stage (looking just through these two lenses), it would appear upside-down and reversed because of the way photons travel through very small openings (in middle school or high school, you may have done an experiment with pinhole cameras to see how this works).
Erector Tube Assembly
The third and fourth lenses are found on either side of the erector tube assembly, a cylindrical tube that moves in tiny increments as you adjust the windage and elevation knobs. The lenses on either side of the erector tube assembly don't magnify or flip the image, but elements of the reticle are etched or projected onto them.
Magnification Lens
The fifth lens is the magnification lens. In variable power scopes, it moves forward or backward as the power ring is adjusted, increasing or decreasing magnification. This lens also flips the image again so that it's now right-side up. This is important because your pupil will "flip" the image once more before it gets to your brain, which is expecting to receive an upside-down image that it will then correct.
Ocular Lens and Eyepiece
The last lens along the path — the one closest to your eye — is the ocular lens, held in place by the eyepiece. It magnifies received light and transmits it to your eye.
Scope and Reticle Markings
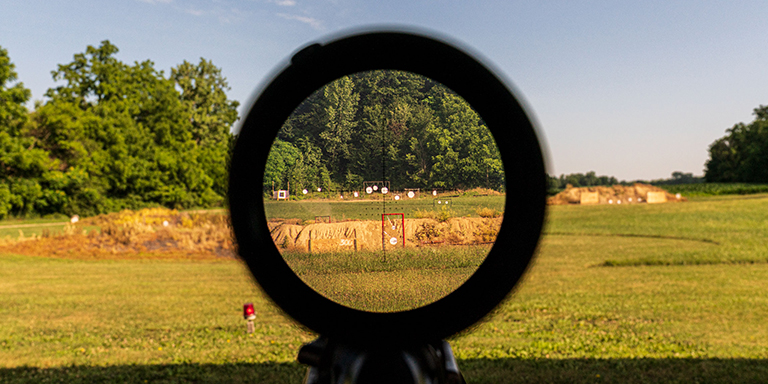
There are too many different kinds of markings you might see on a rifle scope to cover here, so we'll stick to the most common ones.
Reticle Types
Reticles can be etched or powered (and sometimes even both). An etched reticle is simply cut into the surface of the lens, usually with a laser. They're highly visible in bright light but much harder to see in darkness. And of course, the reticle itself can't be adjusted or changed in any way, limiting your options in some situations. On the plus side, they don't require batteries.
Powered reticles are the kind you see in red dot sights. An LED projects the reticle onto a transparent screen or lens, and on some models, you can change the size or shape of the reticle as needed. They're highly visible in all lighting conditions, but they require power, and scopes that use them are generally more expensive.
MOA and Subtension Values
Most rifle scope reticles have at least a few markings on them that can be used to calculate minutes of angle or quickly adjust your point of aim at various distances. A minute of angle (MOA) is a measurement of angles, not distance. 1 MOA is equal to 1 inch per 100 yards of horizontal distance, so on your rifle scope, a 1-MOA dot or circle represents a circle 1 inch in diameter at 100 yards, 2 inches in diameter at 200 yards, and so on.
Subtension values offer a way to shift your point of aim without having to adjust your windage or elevation turrets. On rifle scopes with crosshairs, the crosshair lines are often thicker near the outer rim of the scope and thinner toward the center. The thickness of each line corresponds to an MOA value (for example, 0.2 MOA at the thinner part and 0.5 MOA at the thicker part). In this example, if you need to adjust your point of impact by 0.2 MOA, simply move your point of aim by a distance equal to the width of the thinner line. This method is less accurate than adjusting your turrets, but it's a lot faster, and it doesn't require breaking your sight picture.
There's more to know about minutes of angle, so be sure to consult our introductory guide to minutes of angle as needed.
Tips for Buying and Adjusting Your First Rifle Scope
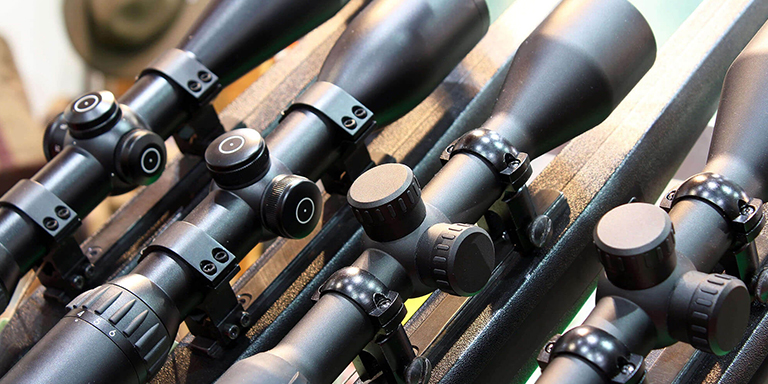
First things first: if you don't already know how to zero your rifle, learn that first. Attaining a perfect zero is confirmation that you understand how to use and adjust your scope.
Any experienced rifle shooter will tell you that a high-quality scope on a cheap rifle will produce better results than a cheap scope on a high-quality rifle. If you're on a budget, prioritize the scope over the rifle as much as possible.
Eye relief (the proper distance between your eye and the ocular lens) is a somewhat individual matter; it depends on your vision and on the particular scope in question, among other factors. On average, four inches is about the right distance, but you may have to get closer or farther from the ocular lens to get a crystal-clear, perfectly-aligned sight picture. Experiment carefully, but beware that getting too close to your scope can result in a recoil-induced eye injury (called "scope eye"), especially if you're using a high-caliber rifle.
Once you've got your new scope properly installed and zeroed, field test it under rugged conditions to test its durability and reliability. High-end scopes from reputable manufacturers usually have a decent money-back return period, but only if the scope is undamaged and can be restored to like-new condition. In particular, ensure that the scope stays firmly fixed in place while walking, climbing or riding in a vehicle; cheaper scopes often don't stay mounted very well. Fog or condensation on the inside of the lens is a sign of a serious quality control problem, and the scope should be returned for repair, exchange, or refund. Always keep the lens caps on until you're ready to fire in order to protect the lenses from dirt and damage.
There's a lot more to say about the anatomy of rifle scopes, but you should now know enough to buy one with confidence and use it with basic proficiency. If you're still somewhat new to rifle shooting, be sure to also review our guides on rifle anatomy, basic principles of long-range marksmanship and choosing a red dot sight.