


Whether you're a glamping rookie or a bushcraft expert, knowing how to call for help is an indispensable skill in your outdoor toolkit. One could even argue that it's the most essential skill to practice before venturing into the wilderness, especially if you're going alone.
This guide will lay out several techniques for signaling for help in various situations and environments. We'll also cover best practices for pre-trip preparedness and essential gear to bring along.
Preparations to Make Before Leaving Home

Anytime you're likely to find yourself in a potentially dangerous situation, it's best to take certain steps ahead of time. These four strategies will greatly increase your chances of rescue, should you ever need it.
Let Someone Know Where You're Going
The best preventative measure you can take is also the easiest: never go on a camping trip or bushcraft expedition without telling someone else where you're going and when you plan to return. Provide that person with maps of the area and your itinerary, if you have one. Once you leave for your trip, never venture outside the area you said you'd be staying in.
Should you need rescue, your rescuers will be much more likely to find you if they know exactly where to look. Roughly half of people lost in the wilderness are found if they told someone else where they were going, but in cases where the lost person didn't do that, their odds of rescue drop to less than 1%.
Take Classes or Find a Mentor
If you're inexperienced in the great outdoors, brush up on basic survival skills before heading out, especially if you're going alone. Your local Game and Fish Department likely offers classes and workshops, often for free or cheap. Should you need to signal for help in the wild, it might be a long wait until you're rescued. You'll need to be able to hunt, fish, forage, and defend yourself in the meantime.
Practice Close to Home
Nature can be harsh and unforgiving, so practice your essential survival skills in a relatively safe environment at first. Stay close to a populated area and bring plenty of food and water in case you aren't able to find any. Ideally, choose a training area with cell phone service so you can easily call for help if you get lost, and let someone else know where you're going (even though it's just a practice run).
Study the Area Before You Leave
Before you head out, find and study topographic and satellite maps of the area (we have a guide to basic map reading skills if you need it). Take note of any potentially dangerous areas (high cliffs, unstable ground, canyons, etc.) and of places that might make it harder or easier to signal for help. For example, large, dense forests make it difficult for anyone to see your signals from the air; hilltops and open spaces are better choices.
Essential Signaling Gear
There are many ways to signal for help and many items you can use to do so. You don't necessarily need to bring all of these things on every trip, but most of them should be part of your standard survival kit anyway.
Survival Knife
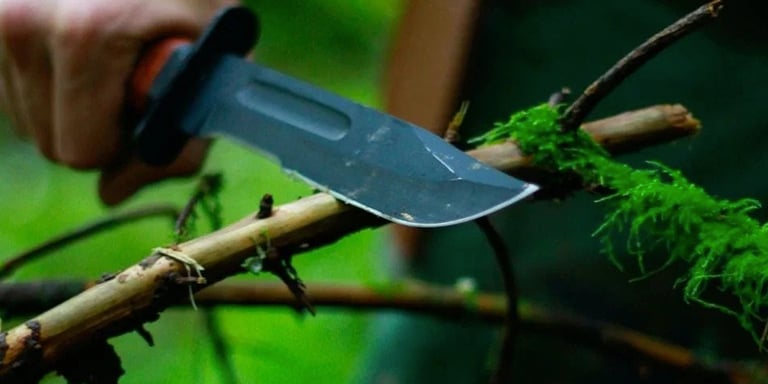
A good knife is, by far, the most important thing to pack. Invest in a high-quality, durable model that will last decades, even if you're on a tight budget. With the right tactical knife, you can defend yourself, hunt and prepare food, and craft many other useful tools, including items used to signal for help.
Ranged Weapon
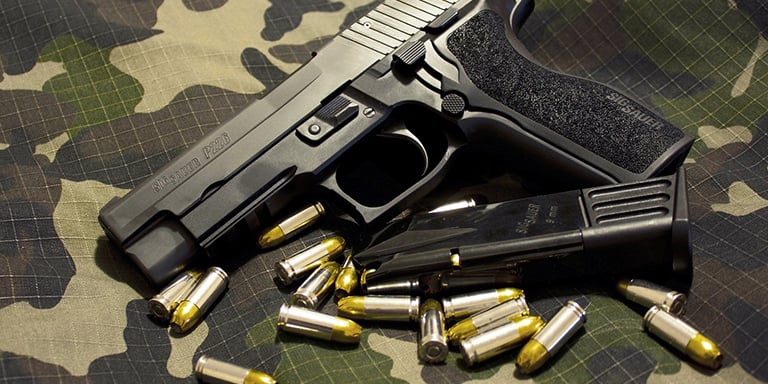
Although not strictly necessary, we recommend always bringing a firearm (or bow) whenever you wander far from civilization. Whatever weapon you choose to bring, make sure you know how to use it well and safely. Firearms are useful for more than hunting and self-defense; they're loud, too, which is a good thing when rescuers are looking for you.
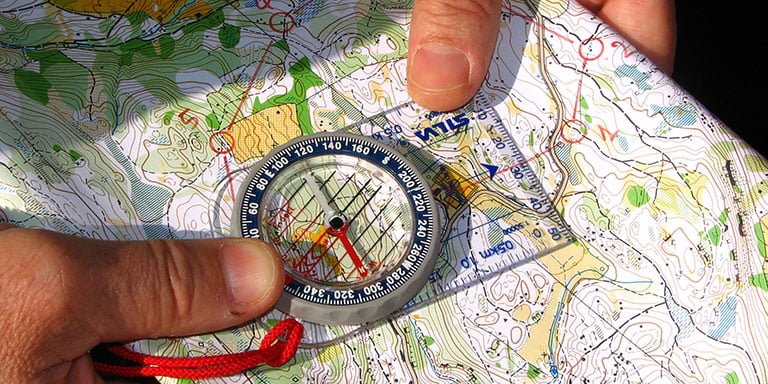
Compass and Map
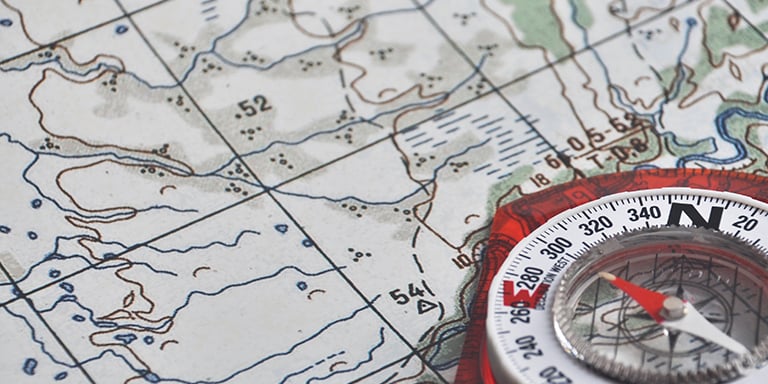
Always bring your basic map-reading and land navigation supplies, as well as protective cases and plastic overlay sheets to protect them from the elements. Even if you aren't able to get yourself fully un-lost, you can at least navigate to a better signaling location.
Bright Flashlight
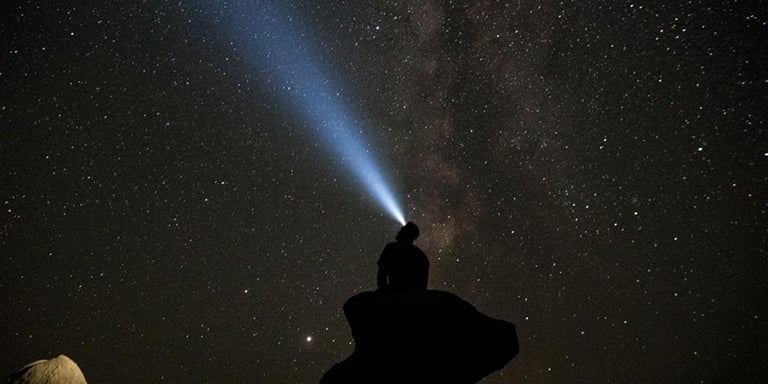
These days, portable, durable, ultra-bright flashlights are pretty affordable. Never leave home without one — it's one of the simplest ways to make yourself more visible at night. If you don't have a flashlight (or if you're looking to upgrade), our guide to choosing a tactical flashlight is a must-read.
Reflective Materials
Small, lightweight items such as hand mirrors and foldable emergency blankets can help rescuers find you by reflecting the sun or your flashlight.
Fire-Starting Supplies

The light and smoke produced by a campfire can both help people find you. Make sure you practice a variety of fire-making techniques to maximize your options.
Rope
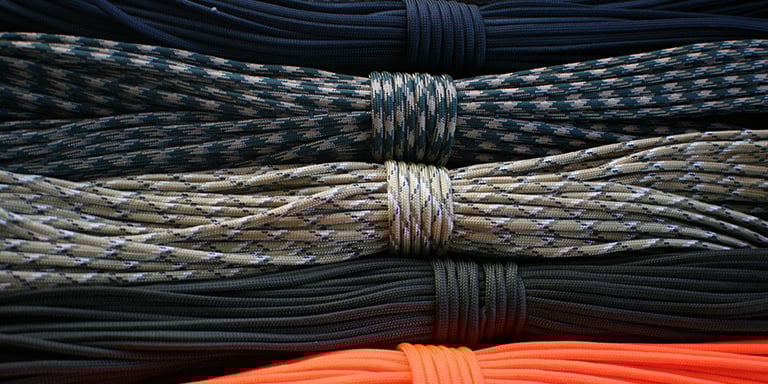
When it comes to signaling for help, rope has a variety of uses. It can be used to run up brightly-colored signal flags, mark a path through a confusing area, or reach high places that are more visible to rescue workers.
Radio, Phone and Locator Beacons
Should you need help, modern technology is often the best way to get it. Pack a portable wide-band radio and a satellite phone, if you can afford one. Many satellite phones don't even require a service plan to place emergency calls. Locator beacons are somewhat expensive, but they can be real lifesavers. To use one, just turn it on when you're lost and it will broadcast your exact position to rescue workers automatically.
General Signaling Strategies and Best Practices
How you signal for help is just as important as the tools you use to do it — maybe even more so. To make it as easy as possible for rescuers to find you, always follow these three basic rules.
Try Several Different Methods at Once
As the old saying goes, don't put all of your eggs in one basket. All too often, people are stranded in the wilderness longer than they otherwise would have been because they relied on only one help signal. Using any and all signaling methods at your disposal makes it more likely that someone will notice one of them.
Wait for the Right Opportunity
In a life-or-death emergency, it's hard (but absolutely essential) to keep your cool. It's not always prudent to signal for help as soon as you realize you're in trouble. For example, if you have a flare gun, it's best to use it only when you know there are rescuers nearby. If you use your flares at the wrong time, there may not be anyone to see them, and then you'll be out of flares when help arrives.
Know the Official Rescue Signals
Even some avid outdoorsmen are unaware that there are official visual signals to be used when you need help. Knowing them could make the difference in a time of dire need.
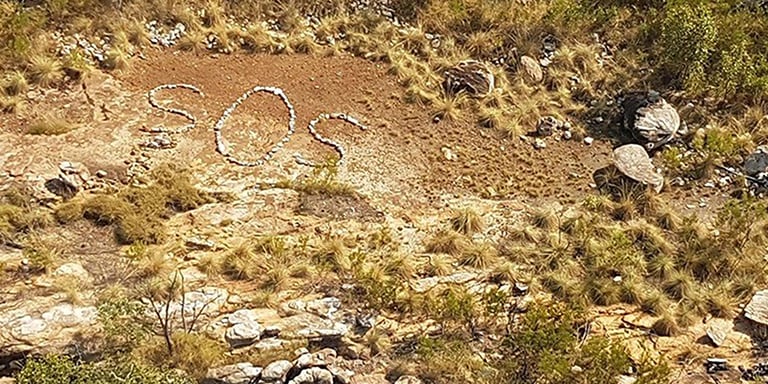
Almost everyone knows SOS: three dots, three dashes, three dots. It can be transmitted visually as well as audibly, such as by arranging large rocks on the ground.
Holding your arms above your head in a V shape is the universal sign for "We need help."
Crossing your arms in an X shape means "We need help immediately — someone is critically injured, or time is otherwise a factor."
Avoid waving your arms. This is actually the sign for "Everything is ok," and rescue pilots might think you don't need help.
If the situation calls for it, you can use rocks or branches to write simple messages on the ground: Y for yes, N for no, or arrows to point rescuers in a certain direction.
How to Choose the Best Place to Signal
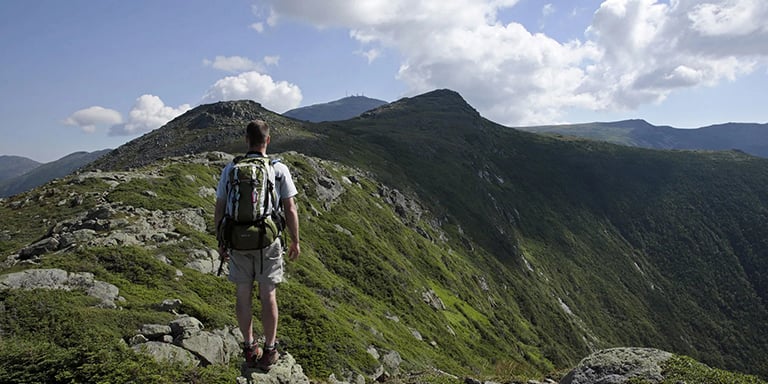
In most cases, the highest spot you can find is ideal. Visual signals are most likely to be seen if they're higher than everything else nearby. However, if you're using a signaling method that needs to be large, such as letters spelled with stones, a big, flat, open space is best, even if it's not the highest point in the area. If possible, choose a spot that isn't next to a mountain or some other large object that could block the line of sight to your signal from certain angles.
Also consider your surroundings when using visual signals. For example, a column of thick black smoke from a fire will be much less visible against a cliff face made of dark rock; a clear blue sky or a wall of light-colored rock would be a better backdrop. Similarly, use dark rocks if the ground is lightly-colored and vice versa.
For sound signals, try to find a place with great acoustics and lots of echo, like a narrow gorge or thick forest. The more things there are for the sound waves to bounce off of, the farther the sound will travel — but be aware that it will also be harder for rescuers to pinpoint where the sound is coming from.
Low-Tech Signaling Methods
Technologically advanced help signals are great because, of course, they have the ability to put you in contact with rescuers instantly and directly. Most are pretty easy to use, like the satellite phones and personal locator beacons we discussed earlier, but like all high-tech devices, they're not perfectly reliable, so be sure to have some low-tech options in your back pocket as well.
Ground-to-Air Signals
As the name implies, ground-to-air signals are visual signals meant to be seen from aircraft. Almost anything can be used, but rocks and branches are common because they're easy to find in most places. Private planes and rescue aircraft usually fly under 5,000 feet, but even at that relatively low height, your signals need to be big in order to be visible. Each letter or symbol in your message should be at least 20 feet long, and bigger is better. Yes, that's a lot of material and a lot of work, but if you make your ground-to-air signals too small, people in aircraft won't see them.
Ground Markers
Whereas ground-to-air signals are meant to be viewed from the air, ground markers are meant to signal people searching for you on foot. These markers could be anything from strips of bright fabric tied around trees to written messages or trails marked by taut rope. In any case, make sure that the markers are unmistakably unnatural and attention-catching; you don't want rescuers to misinterpret or ignore them.
Ground markers are usually best for situations wherein there's a relatively open area close to your actual, less visible location — for example, a wide trail a few hundred yards from the cave you've taken shelter in. Place markers in the open area where they'll be most visible and arrange them to make a clear and obvious path to your location. If possible, write "Help" or "Rescue needed" on every marker so passersby don't mistake them for something else.
Tarps and Signal Flags
If you have large pieces of fabric, they can be tied to the tops of trees or other tall objects to mark your location. The bigger and brighter, the better. In most situations, one big flag is better than several small ones because it'll be much easier to see.
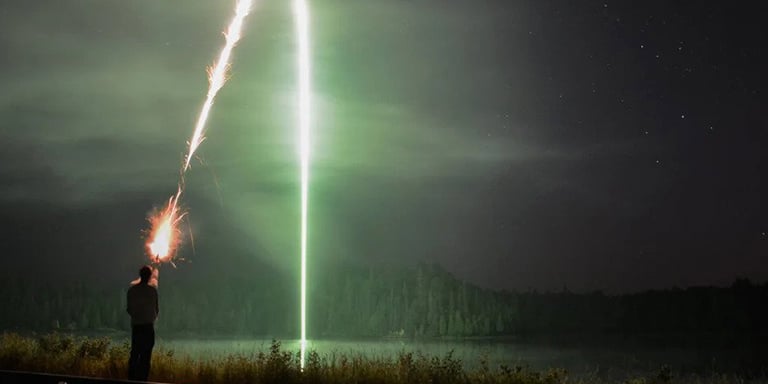
Fire, Flares and Smoke
Signal fires can be a good option, but they require constant tending and consume a lot of raw materials, so it's best to make a fire only when you're fairly sure that rescuers are nearby. As is the case with signal flags and ground-to-air signals, bigger is better. A bigger fire makes more light and smoke, but be extremely cautious and exercise meticulous fire safety; the bigger the fire, the more easily you can lose control of it. Clear all flammable materials in a wide area around the fire to minimize the chance of flames spreading unintentionally.
Moist foliage makes a lot of smoke, so add it to your fire for better visibility. Feel free to add anything else that makes smoke, such as plastic or styrofoam (normally, it's a bad idea to burn these things, but when your life is on the line, go right ahead).
Flares burn brightly and can be great signaling devices, but most burn out after a few minutes, or an hour at most, so make sure you save your flares until you're sure rescuers will be able to see them.
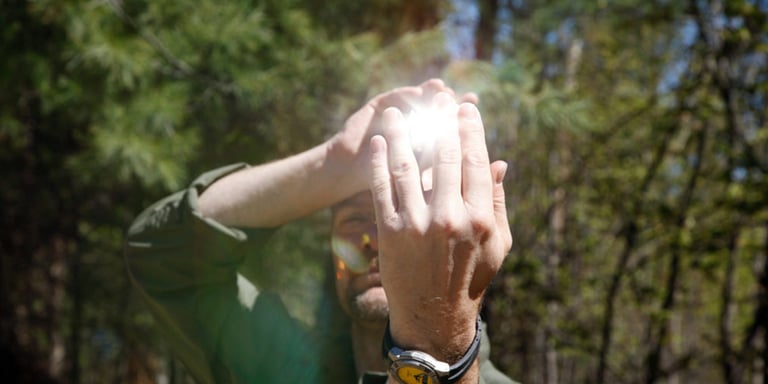
Reflective Devices
Mirrors and other reflective objects can be used to signal for help, but they're usually not the best method because reflected light is hard to see and easy to misinterpret. Reflective signals work best when used together with other signaling methods that are unmistakably calls for help.
Of course, this method works best in bright sunlight, or with a high-powered flashlight. Either way, it can be tricky to judge the right angle and position, so move the reflective surface around in a variety of patterns to make the reflected light more noticeable.
Whistles, Gunshots and Other Sound-Based Signals
Sometimes, rescuers just won't be able to see you. For example, if you're stranded in a deep canyon or under heavy tree cover, you'll be completely out of sight. In such cases, loud sounds are your best bet. Inexpensive emergency whistles make surprisingly loud noises, as do dead logs when given a good whack with a heavy object. Make a pattern of sounds that is clearly human and deliberate, such as a repeating SOS signal (three short sounds, three longer sounds, then three short sounds again).
You can use a firearm to make loud noise, but for obvious reasons, this should be a last resort. Safety is a prime concern; take great care not to fire into the air or in any direction that might hurt or kill someone. Fire into water that's at least 2 feet deep or soft soil, if possible.
When it comes to wilderness survival, a little preparation goes a long way, and this is especially true when you need to signal for help. Small mistakes or inefficiencies in the way you signal for help could doom a rescue that otherwise would have been successful. To maximize your chances of getting home safely, practice the techniques we've outlined here and, above all, stay calm and be patient.
Did you find this article helpful?
Related Articles
-
How to Build a Survival Kit
Being prepared is vital in a survival situation. We review the essential elements of building a basic survival kit.
Skills
137 others found this helpful -

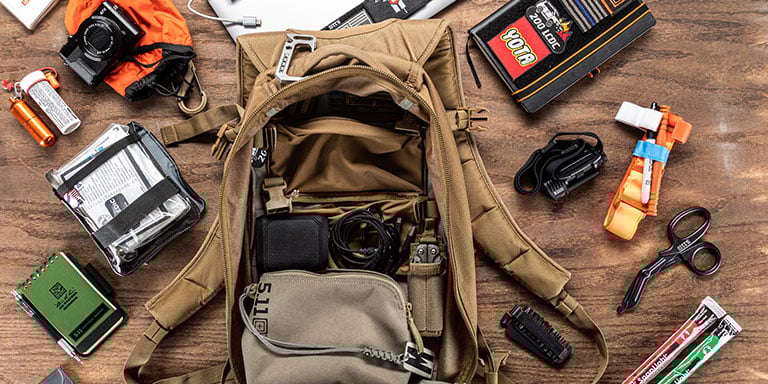
Bug Out Bag Checklist: The Essential Guide to Bugging Out
Our survival experts created the essential guide for packing the right emergency gear in your bug out bag.
Checklists
98 others found this helpful -
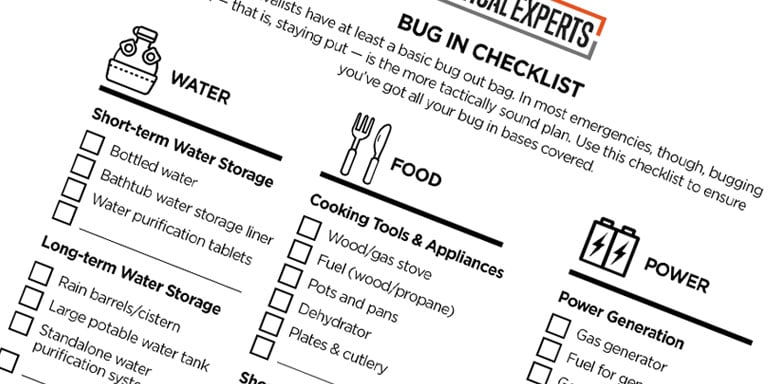
Bug In Checklist: The Essential Guide to Bugging In
Learn how to bug in if a disaster strikes. We laid out how to maximize your food and water supply and more in this guide.
Checklists
74 others found this helpful -

Basic Survival Medicine
Read both preventative and curative steps to help stay healthy in the wild, where it matters most.
Skills
41 others found this helpful -
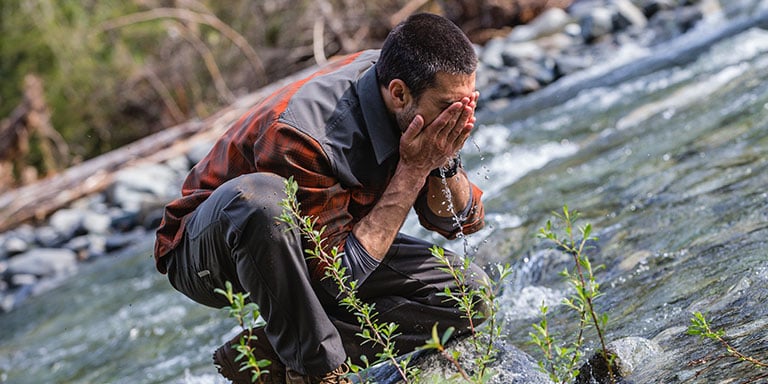
How to Find Water in a Survival Situation
Use this guide to establish reliable access to clean water, no matter what part of the world you’re in.
Skills
37 others found this helpful -
Map Reading Fundamentals
We lay out the basics of map reading and cover essential tools and terminology to help make land navigation simple.
Skills
34 others found this helpful
