

Getting ready for a large-scale emergency can be an intimidating proposition, especially if you're short on time or money. It's easy to feel so overwhelmed by all the unchecked boxes on your to-do list that you never get started.
The good news is that you don't need a month off work or thousands of dollars to make meaningful progress. Like most things, real progress comes in the form of steps that are small but consistent. Try following a philosophy of “no zero days,” which just means doing something every day to increase your readiness, even if only by a tiny bit. That could mean picking up an extra case of bottled water during your normal grocery shopping or reading an article about hydroponics. These small investments of time and money add up to big returns over time.
In this guide, we'll review the five most essential survival skills to practice. In many cases, they can be broken down into smaller tasks that you can work on for an hour at a time, or less. Of course, there are many more important survival skills—we think these are the five that will be most helpful to you in a disaster or emergency scenario.
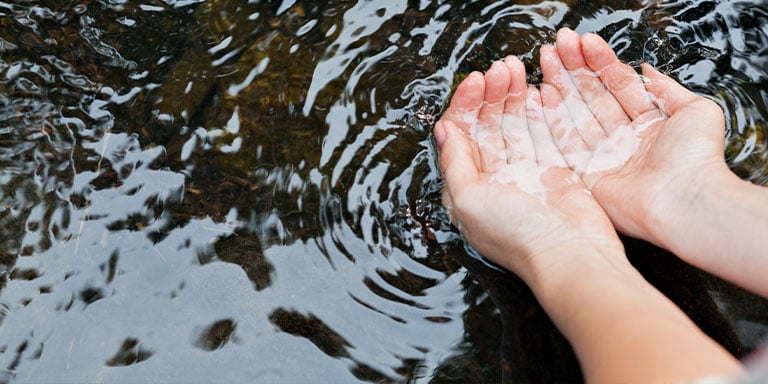
Finding Water
All survivalists should know the “rule of threes.” The average person can survive for about:
- Three minutes without air
- Three hours without shelter in extreme weather
- Three days without water
- Three weeks without food
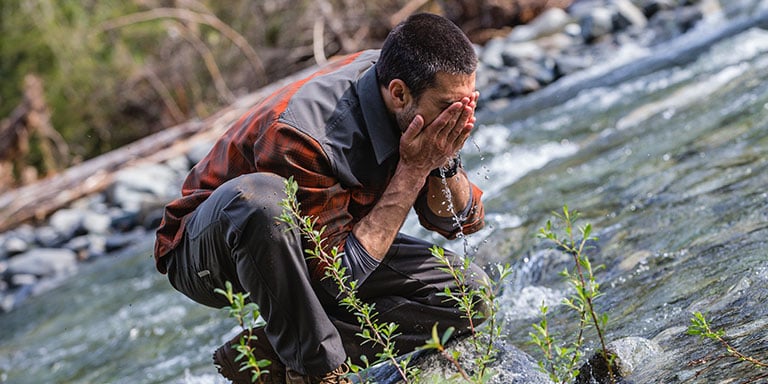
We'll cover shelter in the next section. In most survival situations, clean water will be your most pressing need because dehydration will likely be the first thing to kill you. There are two basic steps: finding water and making it safe to drink.
The best places to look for water depend heavily on where you are. In most places, these general tips will be helpful:
- Water always flows downhill and along the path of least resistance. Look in low places or follow channels and depressions that look like they may have been created by flowing water.
- Look for birds, insects, and other wildlife—they often gather around water. You can also try following animal tracks, especially when multiple sets of tracks all lead in the same direction.
- Dig in places where the ground is soft and moist—there may be water just below the surface.
Here are some basic, regionally-dependent strategies to try:
- Melt snow or ice, but be sure to boil and filter it before drinking—failing to do so could make you very sick.
- Harvest rainwater, which is generally safe to drink as-is.
- In desert regions, look for trees that grow in valleys or depressions; rainwater is likely to pool there. You can also cut open certain cacti and drink the water inside, but do your research first because some cactus water isn't safe to drink.
- You can also get small amounts of water by eating moist foods such as fish, berries, and leafy vegetables.
Once you've found some water, you'll want to purify it before drinking. The three basic methods of purification are boiling, filtering, and chemical purification. Boiling and filtering are best done together (filter first, when possible). Chemical purification tablets are cheap and can quickly make most water safe to drink as long as it looks reasonably clean to start with, but they can leave an unpleasant aftertaste.
For more in-depth strategies and tricks, be sure to check out our guide to finding water in the wilderness.
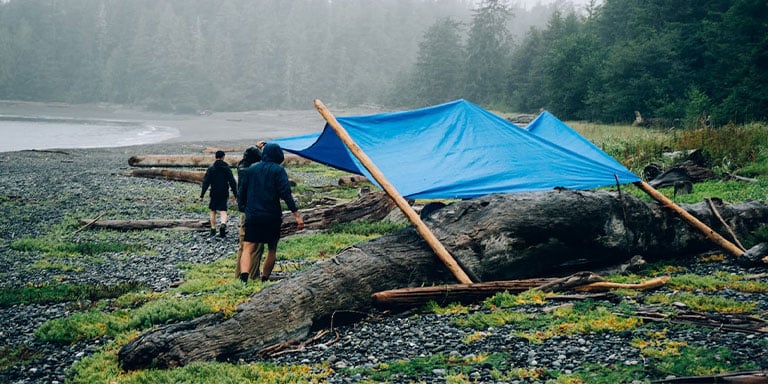
Finding or Building Shelter
In a survival situation, it's usually better to find shelter than to build it (we're advocating efficiency here, not laziness.) Building shelter from raw materials takes a lot of time and energy that could be spent elsewhere, and you'll likely be chronically short on both.
Man-made structures and natural terrain features like caves can both be good options, depending on your needs. When you find a suitable place, consider that other people or wild animals might already be using it, so investigate carefully to make sure it's unoccupied before you move in.
If you must build shelter, keep it as simple as possible. If it's cold outside, preserving your body heat and keeping out wind or rain are the most important considerations. Simple structures like lean-tos, leaf huts, and snow caves can be built in a few hours with few or no tools.
A tarp tent is a quick and simple shelter that works well in regions with mild weather. String some clothesline between two trees or wedge a sturdy branch between them. Drape a tarp over the string or branch, stake the corners to the ground, and crawl inside. It may not be very warm, but it keeps the rain out, and it should work as long as it's not super cold or windy.
For more in-depth tips on protecting yourself from the elements, take a few minutes to review our guide to finding or building shelter.
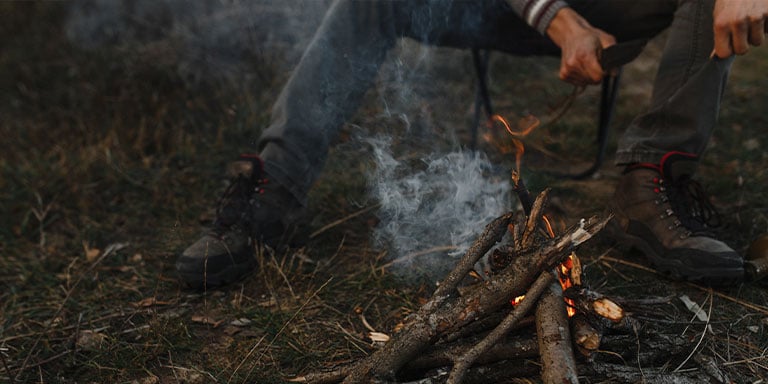
Making Fire
One could argue that mastering fire was humanity's first step toward becoming the dominant species on Earth. Fire gives us many gifts, including light, heat, comfort, defense against predators, and the ability to make food both tastier and safer to eat. These are the same basic reasons you should know how to make fire in less-than-ideal conditions.
The location of your fire is key. Make sure the site you select has as many of these characteristics as possible:
- Shielded from wind and rain
- On flat ground or atop a slight incline
- Far from foliage that could ignite unintentionally
- Close to water or loose soil, in case you need to put the fire out quickly
- Visible to others in the area (or not visible, if you don't want to be found)
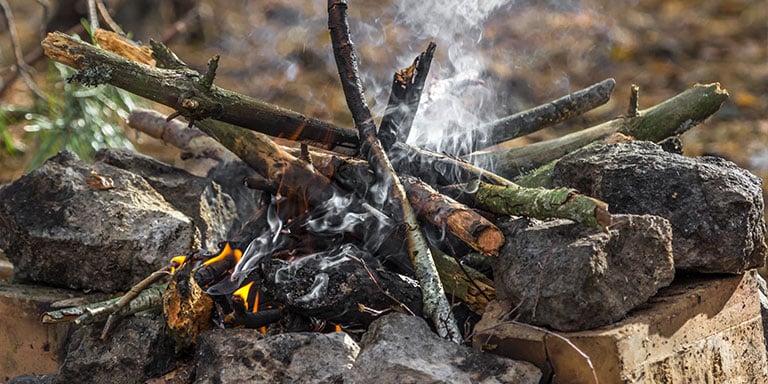
If you master three simple types of campfires—the log cabin, the cone, and the pyramid—you'll be prepared for eighty to ninety percent of situations. Each has its pros and cons
- The log cabin is great for both cooking and warmth, but it consumes a lot of fuel and has a fairly large footprint. Lay two logs a few feet apart, then another two on top, rotated ninety degrees. Make three or four layers and ignite your kindling in the center.
- The cone is more space-and fuel-efficient than the log cabin, but it's not great for cooking. Arrange the logs in a teepee shape, start your kindling in the center, and gradually add larger logs around the perimeter as the fire burns.
- The pyramid is the most fuel-efficient of these three configurations because it burns slowly, but it has the biggest footprint and provides the least amount of heat. It's ideal for low-maintenance, overnight warmth, as long as it's not freezing cold outside. It's built the same as the log cabin, with two major differences: all of the logs in each layer should be touching one another, and each layer should be smaller than the one below (hence the name). Light the topmost layer and it will burn downward slowly.
Our guide to basic firecraft will be helpful once you're ready to start practicing.
Self-Defense

A word of caution: It's impossible to learn effective self-defense just by reading articles and watching videos, but online content can be a good place to start. To become effective, you'll need to find someone who knows what they're doing and practice with them on a regular basis. This training doesn't have to be a major commitment—an hour a week is a lot better than nothing.
We recommend gaining basic proficiency in both armed and unarmed combat, but if you have no experience with either, we suggest starting with unarmed training for a few reasons. The most important of these is that it takes some practice and experience to accurately estimate the level of force warranted by a given situation. Every year, thousands of people find themselves in serious legal trouble for using excessive force in what otherwise might have been a clear-cut case of self-defense; don't add a weapon to the equation until you have some hand-to-hand training under your belt first.
The essential principles of self-defense are:
- Avoid conflict if possible. Your first priority should be preventing harm to yourself and your family, and the best way to do that is to evade danger entirely.
- If confrontation is unavoidable, commit to violence and don't hold back. Strike hard, fast, and relentlessly, but only within the context of the appropriate section of the force spectrum—you can't stab or shoot someone for punching you one time. Use as much force as necessary to end the threat, but no more.
- Aim for vulnerable areas, such as the eyes, throat, and groin.
- Never attempt to disarm an armed attacker unless you have absolutely no other choice. Hollywood egregiously misrepresents this scenario. In reality, the armed attacker has a huge advantage and will usually win that fight.
Once you buy a gun, your responsibilities increase significantly. It's imperative that you learn and consistently follow the four rules of gun safety, and get high-quality training from a qualified professional before you start carrying the weapon for self-defense purposes.
Our guide to self-defense basics has more detailed information and some tactics you can practice at home.
Basic Survival Medicine
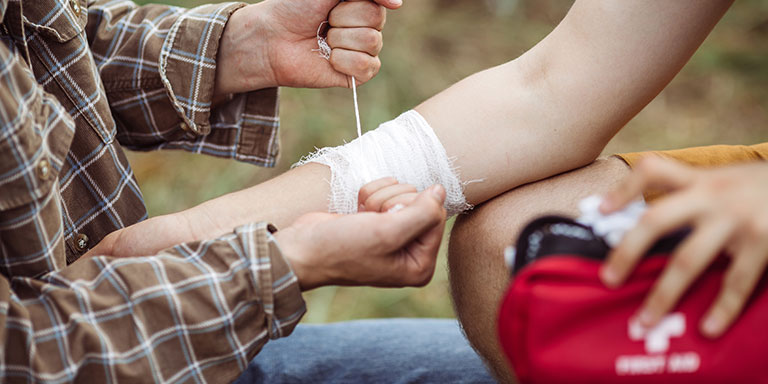
You've likely noticed a pattern throughout this article: Preventing a bad thing is better and easier than fixing it once it's happened. This principle is especially important when it comes to illness and injury.
Even so, someone in your group will get sick or hurt at some point, no matter how careful you are. The more you know about treating common ailments, the better. Of course, the advice in this guide is basic and general, and it isn't meant to replace treatment by a qualified professional.
Everyone in your group should have an IFAK (individual first aid kit) and age-appropriate training on how to use its contents. With an IFAK, you can:
- Stop severe bleeding
- Disinfect and stitch wounds
- Treat sprains and fractures
- Treat some causes of respiratory distress
- Temporarily relieve a tension pneumothorax (a life-threatening condition caused by penetrating chest trauma, such as knife and bullet wounds)
It's important to note that an IFAK mostly contains supplies used to treat serious injuries. It's smaller and more specialized than a general medical kit, and some of its contents require advanced training to use effectively. Be sure to get appropriate training before attempting these procedures on a live patient.
Pre-made IFAKs are available on sites like Amazon for less than $100, but they rarely contain everything you need; be sure to check the contents before you buy. Alternatively, you can purchase an inexpensive first aid kit and buy other items a la carte over time to add to the original kit. This is usually the most cost-effective way to build an IFAK.
Step-by-step instructions on how to perform various medical procedures are beyond the scope of this article. For more hands-on information, check out our guide to basic survival medicine.
If you're just getting started on your emergency preparedness journey, these five essential skills will give you plenty to practice for the first few years. Set aside a few hours per week, a few dollars whenever you can spare them, and you'll be a competent survivalist before you know it.
Did you find this article helpful?
Related Articles
-
How to Build a Survival Kit
Being prepared is vital in a survival situation. We review the essential elements of building a basic survival kit.
Skills
137 others found this helpful -

Bug Out Bag Checklist: The Essential Guide to Bugging Out
Our survival experts created the essential guide for packing the right emergency gear in your bug out bag.
Checklists
98 others found this helpful -
Bug In Checklist: The Essential Guide to Bugging In
Learn how to bug in if a disaster strikes. We laid out how to maximize your food and water supply and more in this guide.
Checklists
74 others found this helpful -

Basic Survival Medicine
Read both preventative and curative steps to help stay healthy in the wild, where it matters most.
Skills
41 others found this helpful -
How to Find Water in a Survival Situation
Use this guide to establish reliable access to clean water, no matter what part of the world you’re in.
Skills
37 others found this helpful -
Map Reading Fundamentals
We lay out the basics of map reading and cover essential tools and terminology to help make land navigation simple.
Skills
34 others found this helpful
